In today’s digital world, securing financial data in expense management solutions is critical. Multi-Factor Authentication (MFA) adds an extra layer of protection by requiring more than just a password to verify user identity. In this article, we’ll cover what MFA is, its role in expense management, and how to set it up in Webexpenses. Want to enhance your security?
- What is Multi-Factor Authentication (MFA)?
- Setting Up MFA in Webexpenses
- Configuring MFA
- Using Backup Codes
- Logging In with MFA
- FAQs
What is Multi-Factor Authentication (MFA)?
Multi-Factor Authentication (MFA), or Two-Factor Authentication (2FA), is a vital security measure that verifies user identity through multiple credentials. It safeguards against hacking, phishing, and compromised passwords.
Setting Up MFA in Webexpenses
In Webexpenses, MFA combines a user’s password with a second authentication factor, typically from an authentication app.
For Administrators:
To enable MFA company-wide or at division levels:
- Navigate to Administrators > Company Profile > Security.
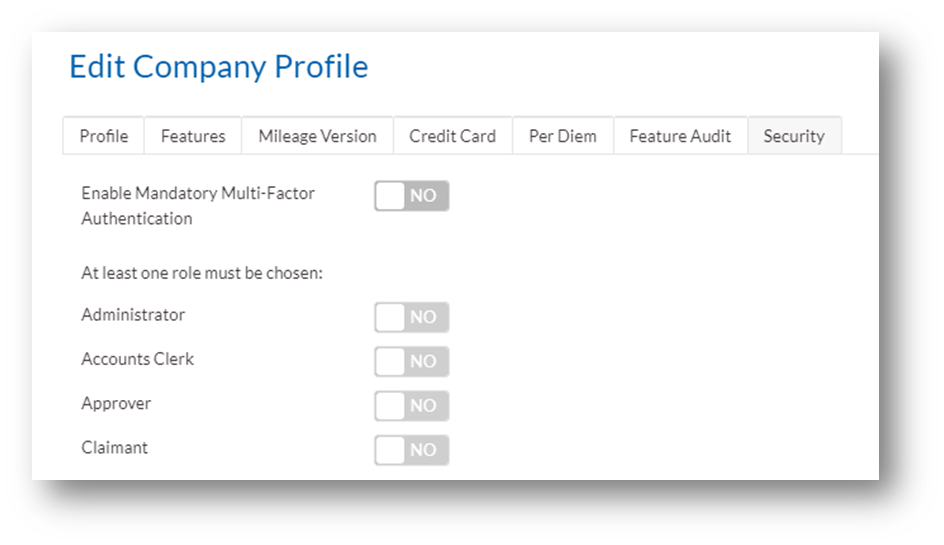
2. Select ‘Enable Mandatory Multi-Factor Authentication’ and choose user roles to apply MFA.
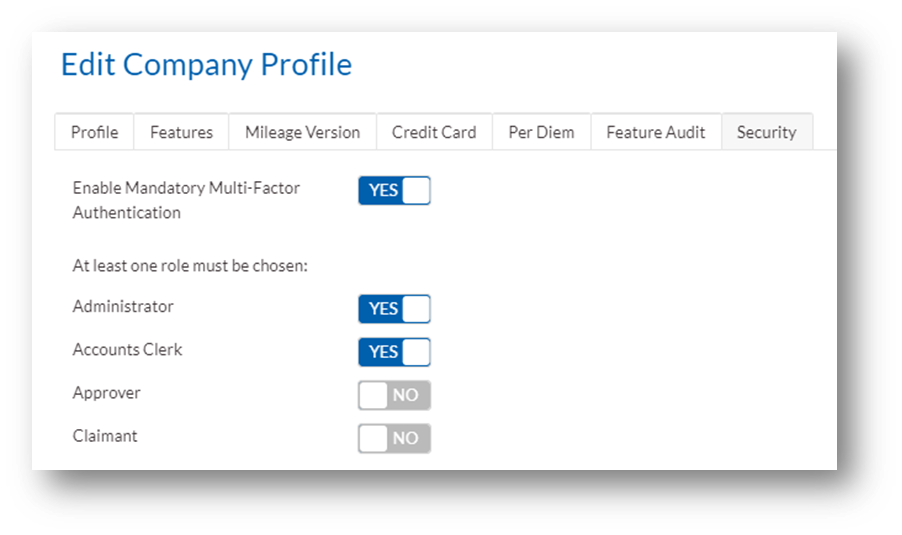
3. Save changes to enforce MFA across selected roles.
Note: Once confirmed, these changes will come into effect for all users with that role against them regardless of the reason they are logging in to the system.
For Individual Users:
To set up MFA for your profile:
- Go to My Settings > Security.
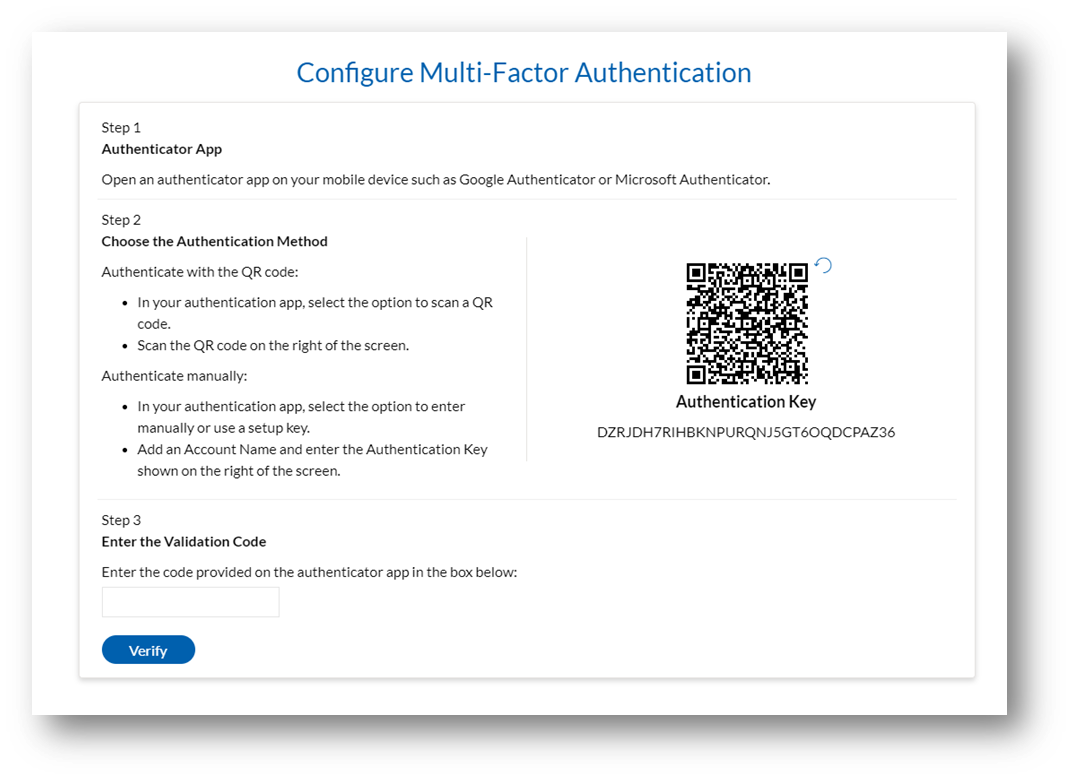
- Click on ‘Configure MFA’ and follow the prompts.
Configuring MFA
- Scan the QR code or enter the provided key into your authentication app (e.g., Google Authenticator).
- Verify setup and securely store backup codes provided.
Using Backup Codes
Store backup codes securely to access Webexpenses if your primary authentication device is unavailable. Regenerate codes via My Settings if lost.
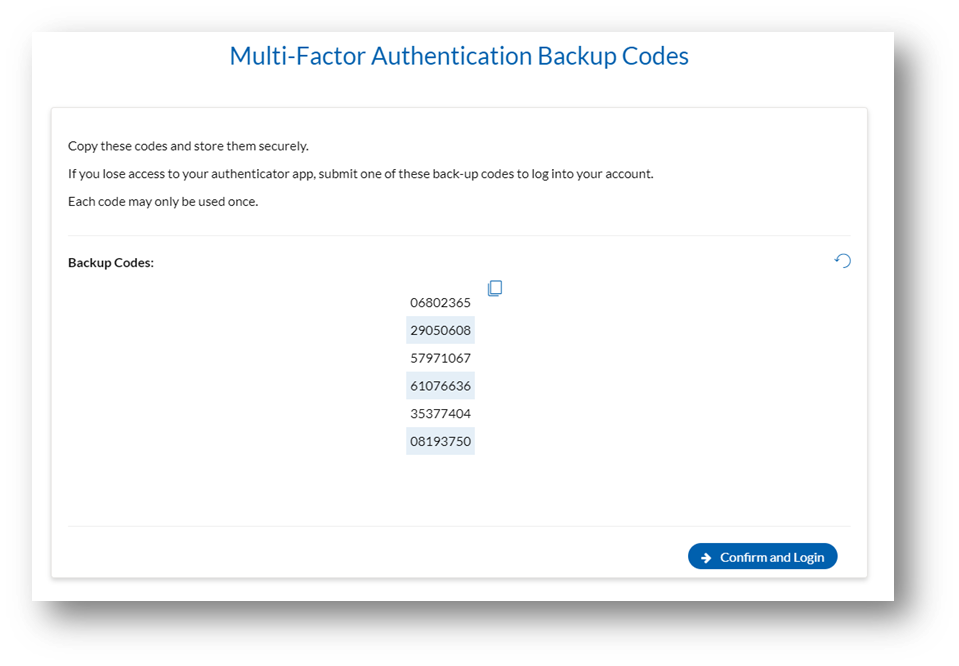
Note: If you lose your backup codes you can generate new codes by signing into Webexpenses. Navigate to My Settings > Security and select ‘Regenerate Backup Codes’. This will void all previous codes and provide new ones.
Logging In with MFA
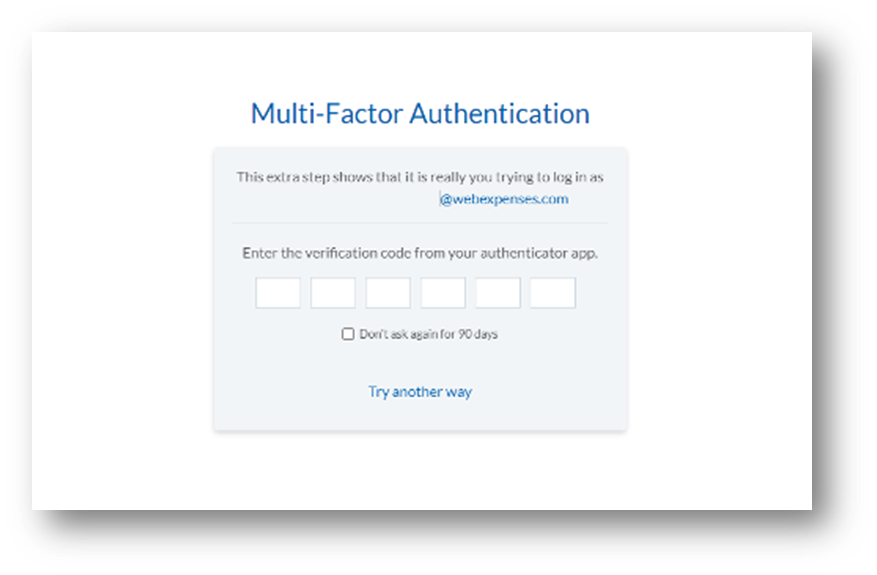
Enter the verification code from your authenticator app to access Webexpenses securely.
Managing MFA Settings:
Administrators can adjust MFA settings under Administration > Company Profile > Security, including adding or removing user roles.
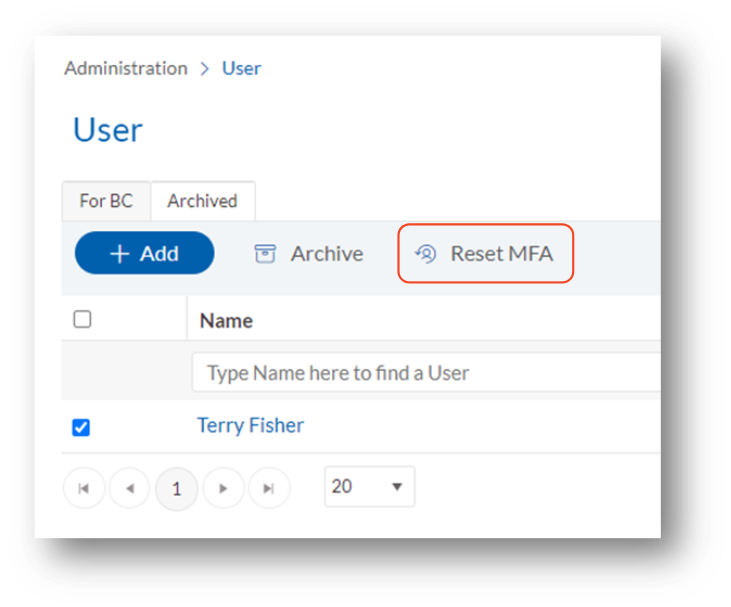
Resetting MFA:
Administrators can reset MFA for users via Administration > Users, ensuring security in case of lost devices.
FAQs
What authentication apps can I use?
Compatible with Google Authenticator, Microsoft Authenticator, Duo Mobile, LastPass Authenticator, and Twilio Authy.
What if I lose my backup codes?
If you know you have lost your backup codes then log into Webexpenses go to My Settings and select ‘Regenerate Backup Codes’ to create new codes.
What if I lost my device and backup codes?
If you lose both your device and backup codes then your MFA will need to be reset by your administrator. Contact your administrator and ask them to reset MFA for your user profile.
On the next login, you will either be asked to configure the details again with your new device or go to My Settings and configure your MFA again.
I’m concerned someone has seen my backup codes, what should I do?
In this situation, login into Webexpenses, go to My Settings and select ‘Regenerate Backup Codes’ to create new ones. This will instantly make any old codes invalid.
How should I store my backup codes?
The best way to store backup securely is in a secure password manager or vault. Tools such as Keeper or LastPass offer secure storage for important information like this.
If you can’t find an answer to your question, get in touch with the Webexpenses team.
Ready to start using the MFA functionality in Webexpenses? Book a demo to learn more today!