Webexpenses Credit Card Receipt Matching feature is an additional tool that will improve and speed up the reconciliation process.
Before the feature was implemented, claimants would have to take a picture of their receipt and manually cross-check it with the correct credit card transaction.
Now, claimants can take a picture of their receipt as usual and Webexpenses will automatically pair it with the correct credit card item. Once a match has been established, they can be submitted ready for reconciliation.
What are the key benefits?
For claimants: It minimises a claimant’s workload by reducing manual intervention when submitting a credit card claim.
For accounts teams: It speeds up the reconciliation process from start to finish.
How does the Credit Card Receipt Matching feature work?
Follow these few steps to understand how the feature works:
1. Add receipt to Webexpenses system
As you typically would, snap a picture of the receipt through the app or upload it via the web application utilising Webexpenses’ OCR technology.
2. Receipt data searches for a match
Once the receipt has been uploaded Webexpenses will look for a matching credit card transaction based on the total amount spent and date of receipt.
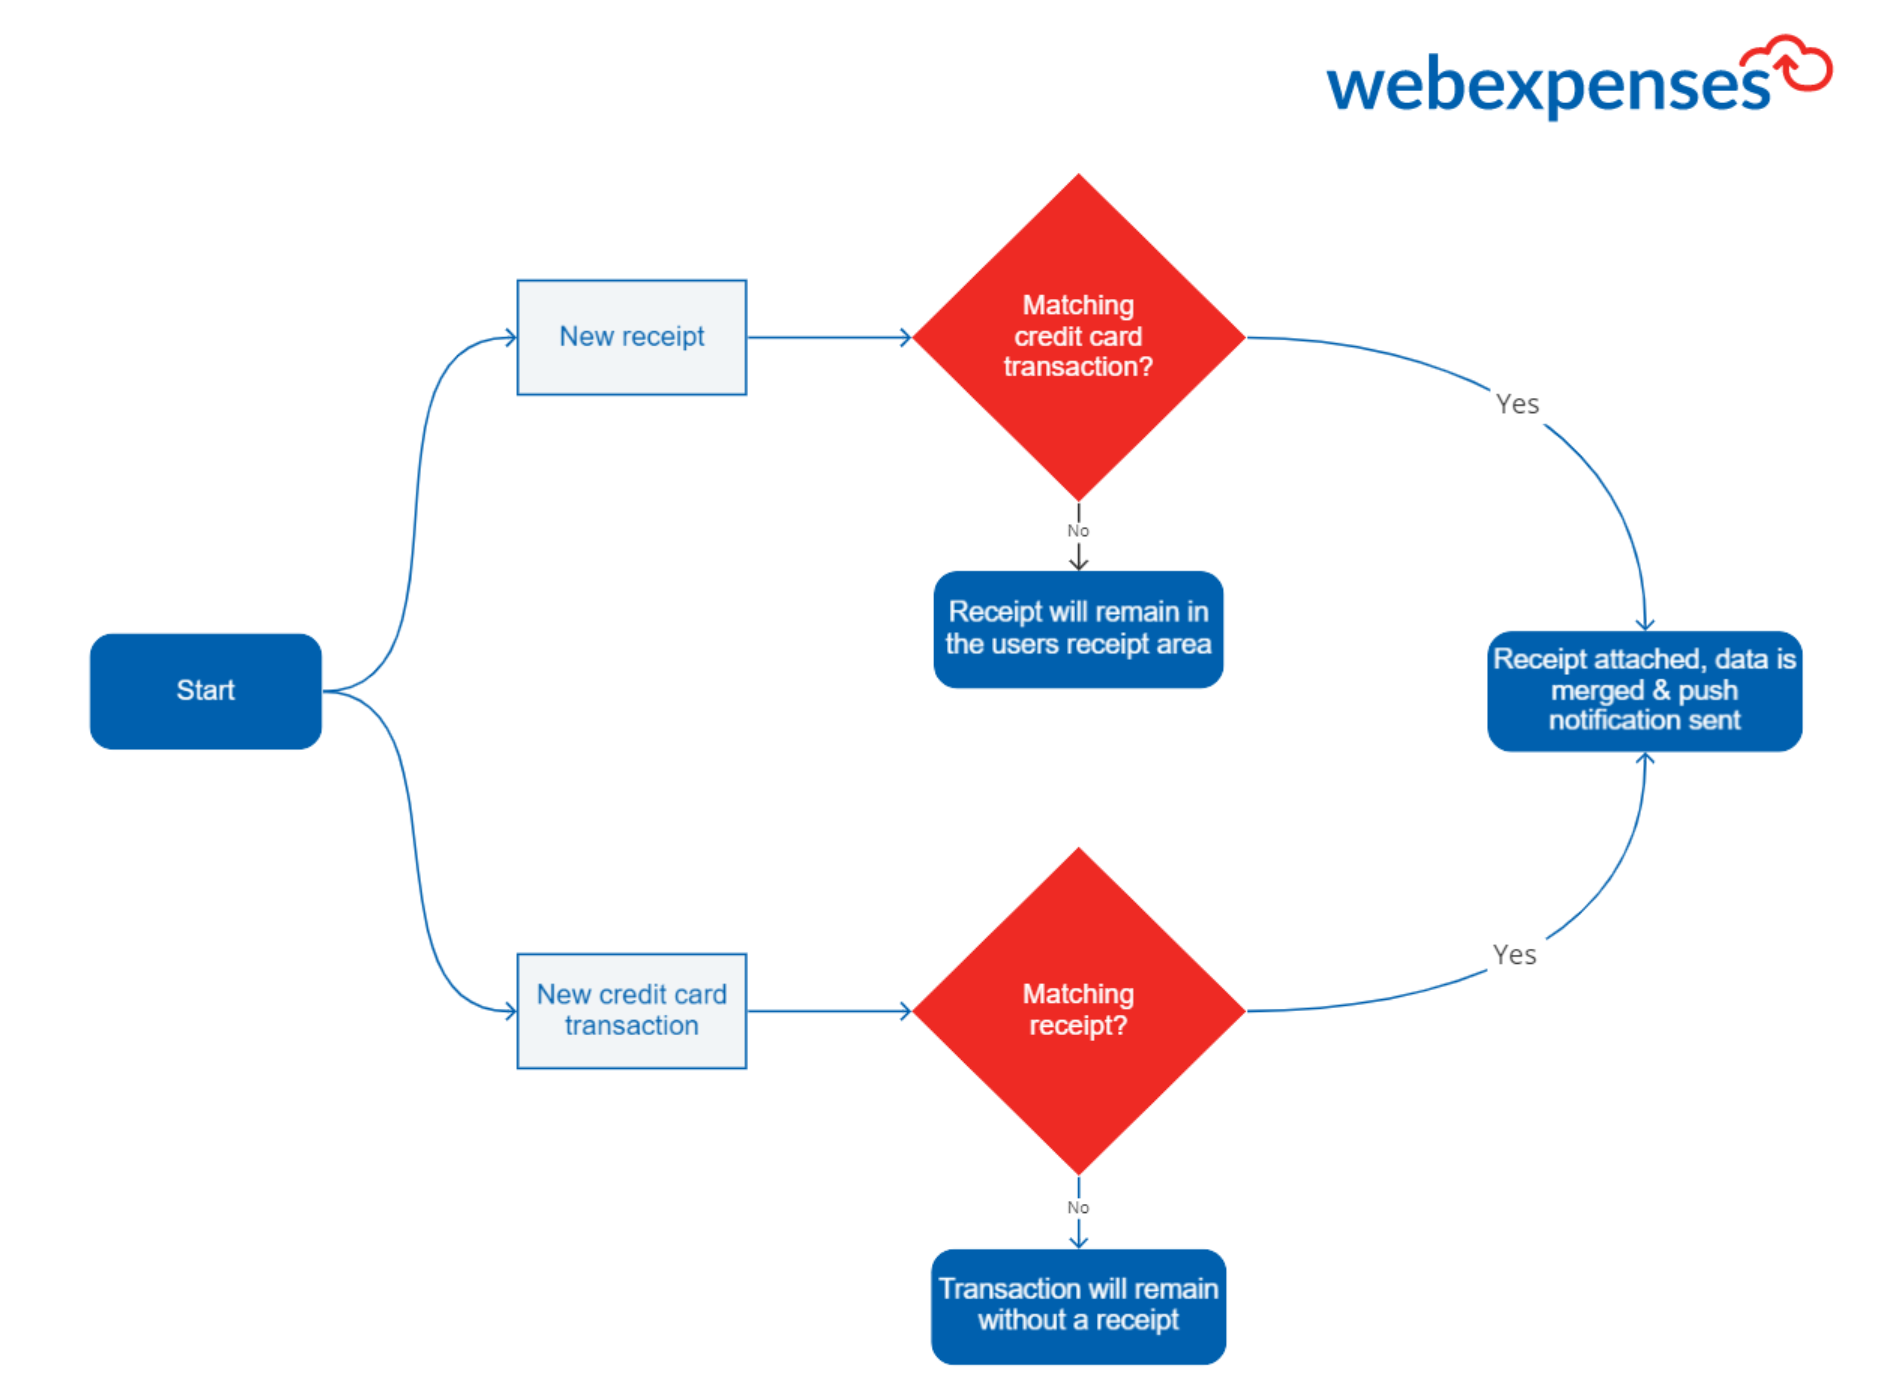
3. Match established
A push notification via Webexpenses Mobile App will be sent to the claimant highlighting a successful match. After clicking on the notification, the claimant will be redirected to the relevant transaction screen for review.
Note: This also applies if the receipt already exists in the system. When credit card transactions feed into the system it will look for a matching receipt. If the correct receipt isn’t found, the transaction will remain without a receipt.
What happens if the data doesn’t match?
If the receipt uploaded does not match a transaction, the receipt will stay within the receipts area.
Receipts will remain within your account until the correct receipt has been paired with the transaction.
What’s next?
Webexpenses admin users can switch on this feature by following these steps:
Navigate to Admin > Company Profile > Select Credit Card tab > Locate the ‘Auto Receipt Matching Enabled’ field and change the selector to ‘Yes’. Then, press save.