
New Feature: Claim Submit Button
With Webexpenses claim submit button, existing and new claimants can now submit expenses in a more efficient, clearer process.
Before the submit button launched, claimants would have to navigate through a longer submission process. Now, the submit button removes the preexisting steps involved and is easier to use for claimants.
How does the submit button work?
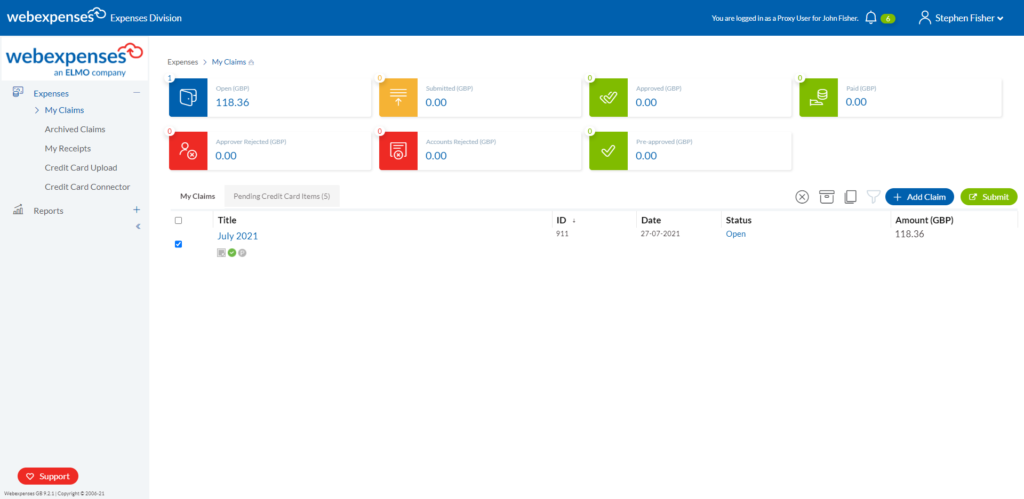
Once you're ready to submit a claim, log in to your Webexpenses account and navigate to Expenses > My Claims where you’ll find a list of your existing claims.
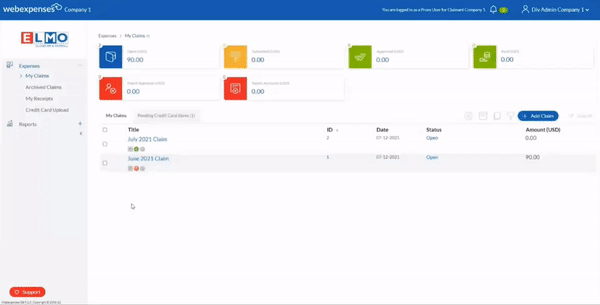
Then, select the tick box next to the claim you intend to submit. Once this is selected, you will see the submit button highlighted in green on the right-hand side. As you click submit, a dialogue box will appear asking you to confirm your claim. You will then receive a notification at the top of the screen to confirm that the claim has gone through successfully.
Alternatively, if you need to unsubmit your claim, the unsubmit button is also available within each claim (if it has already been submitted). To do this, click into your submitted claim and select the unsubmit button on the right-hand side.
Reminder: You can only submit/unsubmit one claim at a time and claims submitted must be either an open claim or rejected status.
Do you have any questions?
To make your user experience with Webexpenses as seamless as possible, we welcome any feedback. Reach out to your Account Manager if you have any questions or suggestions regarding the claim submit button feature.